Getting Started with Amazon Elastic Container Service (ECS) using Fargate means learning how to run containerized applications on AWS without managing servers. ECS handles the container orchestration, and Fargate automatically provisions the compute resources. You just upload your container, set the task configuration, and AWS runs it for you making deployment easier, scalable, and fully serverless.

Lab Steps
Step 1: Sign to the AWS Management Console
1. Click on the Open Console button, and you will get redirected to AWS Console in a new browser tab.
2. Copy your User Name and Password in the Lab Console to the IAM Username and Password in the AWS Console and click on the Sign in button.
Step 2: Creating Container and Task Definition.
1. A task definition is a design file or setup document that outlines how a container-based program should operate inside a container cluster.
2. In Amazon ECS (Elastic Container Service), you need a task definition every time you plan to start a task. A task is basically an active running version of that task definition.
3. The task definition includes important information such as:which Docker image should be used, how much CPU and memory the task needs, what storage or data volumes must be attached, any environment values or settings the container requires.
4. Make sure your AWS region is selected as US East (N. Virginia).
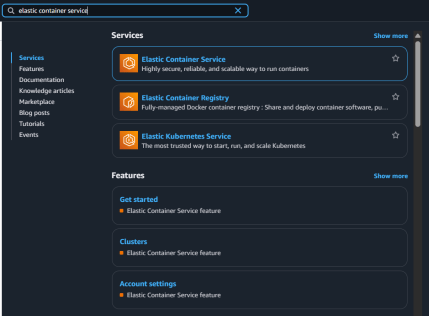
5. From the top menu, choose the Server option, then choose Elastic Containers Service under the Containers category.
7. On the left-side menu, click on Cluster, press the Create Cluster button to continue.

8. Inside Cluster configuration, type the Cluster name as Jeevicluster (your preferred name).
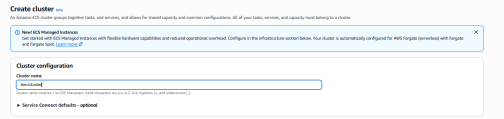
9. Leave all other options as they are (default settings) and click the Create Cluster button.
10. The cluster will be successfully created.

11. Go to Task Definitions from the left-side navigation menu.
12. Click on task definition and then select Create new task definition again.

Step 3: Configure task definitions and containers
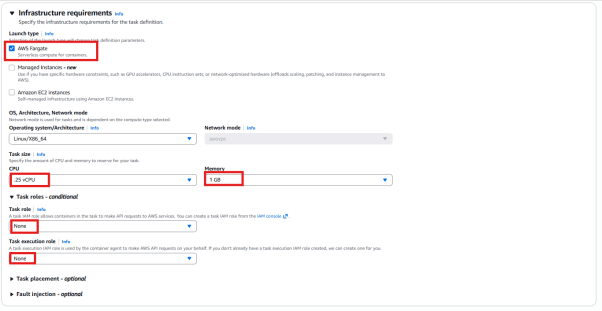
Task definition setup
*Task definition family: Jeevidefinition

* Launch method: Choose AWS Fargate
* CPU allocation: Pick 0.25 vCPU
* Memory allocation: Choose 1 GB
* Task Role and Task Execution Role: Set to None
Note: Ensure you modify the task execution role to None, because the default option is Create a new role.
- Container – 1
Name: sample-app
Image URI: httpd:2.4
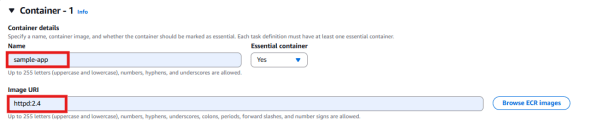
Log collection:Uncheck Use log collection.

14. Leave all settings as default and click Create.
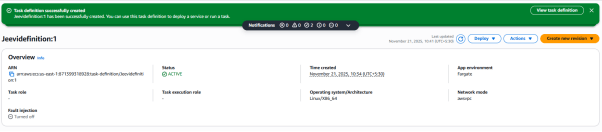
15. The task definition will be created successfully.
Step 4: Setting up the service
1. In this part, we need to decide how to set up the Amazon ECS service that will be generated from our task definition.
2. A service helps us operate and manage a fixed number (required count) of running copies of a task definition inside an ECS cluster.
3. The Amazon ECS sample project is a simple web-based Hello World–type application designed to run continuously.
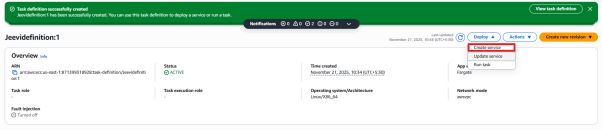
4. Press the Deploy button and then choose Create service.
5. You will be taken to the service page.
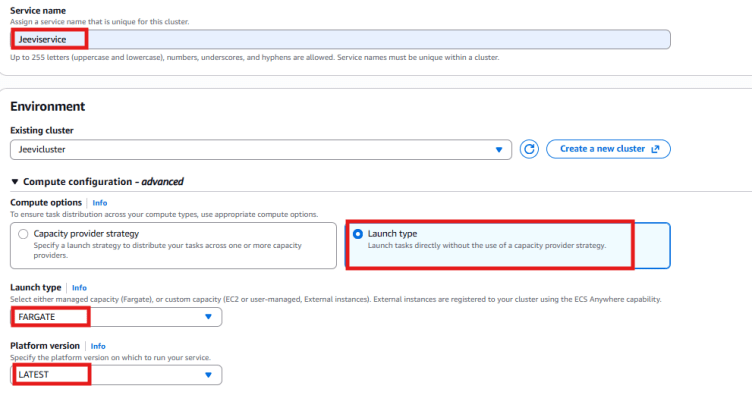
* Service Name: Type Jeeviservice
* Existing Cluster: Select the cluster you created earlier. In this example, the cluster name is Jeevicluster
* Compute Options: Choose Launch Type
* Launch type: Pick Fargate.
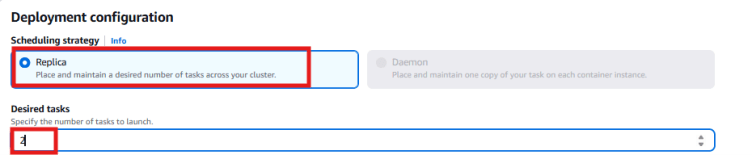
6.Deployment configuration
* Scheduling strategy: Replica (Place and keep the required number of tasks running across the cluster)
* Desired tasks: 2 (Specify how many tasks you want to launch)
Scroll down and open the Networking section.
* Under Security group, select Create a new security group.
* Security group name: Enter Jeeviecssg.
* Security group description: Type Security group for ECS cluster.
* Type: Choose HTTP.
* Source: Pick Anywhere.
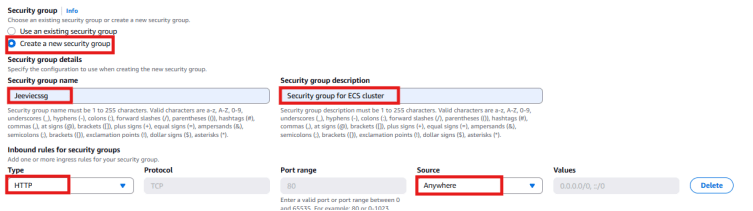
*click on create button.
Step 5: Viewing the service
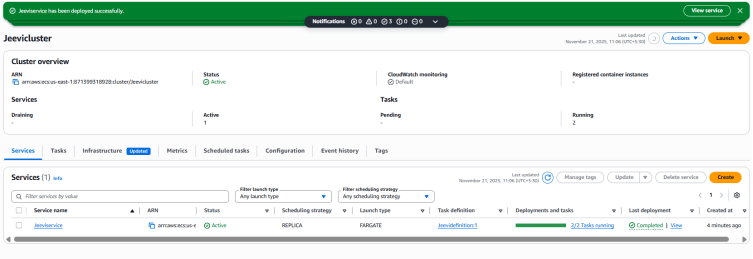
1. Wait until the service finishes deploying. Once it is deployed, you will see the message “Service has been configured successfully.”
2. If your service is a web-based application, like the Amazon ECS sample app, you can open it in a web browser.
3. Go to the Tasks tab.
4. From here, you can check the running tasks and container details.

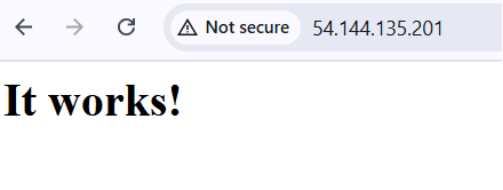
5.Switch to the Networking tab, copy the Public IPv4 IP address.
6. Type http:// before your IP address and open it in your web browser. You should then see a webpage that shows the message “It works.”

Conclusion:
1. You have successfully built a Task Definition, Service, and Cluster using Fargate.
2. You have also verified the Amazon ECS sample application.