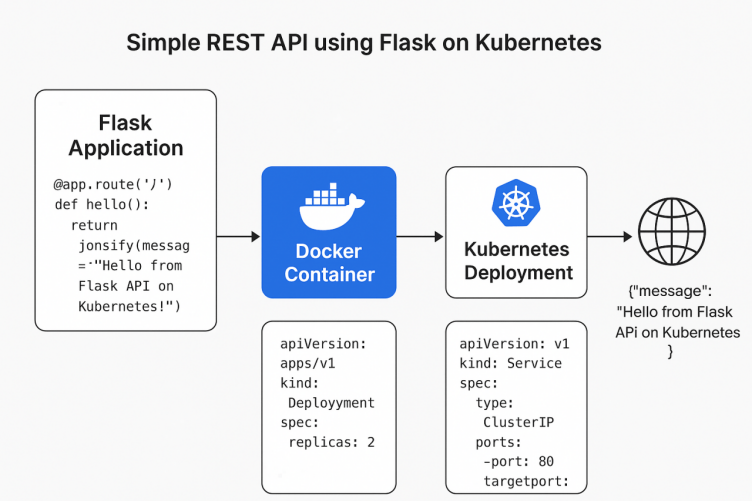
Introduction:
We use Docker to package (containerize) the application, and Kubernetes to run and manage the container.
This project is designed for beginners who want to understand how applications run inside Kubernetes using Pods, Deployments, and Services.
What is Docker?
Docker is a tool that packages your application into a container.
A container is like a small box that contains:
- Your application code
- Python/Flask dependencies
- System libraries it needs to run
So your app:
- Runs the same everywhere (Windows, Linux, cloud)
- Never has “it works on my machine” problems
- Is easy to ship to servers

What is Flask?
Flask is a simple Python framework used to build web applications and APIs.
Reasons beginners use Flask:
- Very easy to learn
- Requires very little code
- Perfect for small projects and REST APIs
�� Flask does:
- Receives HTTP requests
- Returns responses (like JSON data)
- Creates API endpoints
What is Kubernetes?
Kubernetes (K8s) is a system that runs and manages containers (like Docker containers).
It’s like a container manager that handles everything automatically.
Kubernetes does:
- Runs your Docker containers (inside Pods)
- Restarts them if they crash
- Scales them (more Pods when traffic increases)
- Exposes them using Services
- Distributes them across machines (Master & Workers)
Prerequisites.
Before starting, make sure you have the following:
- Docker installed
- Kubernetes cluster (Minikube / Master–Worker setup)
- kubectl command-line tool
- Docker Hub account
Project Folder Structure.
flask-api/
├── app.py → Flask application
├── requirements.txt → Python dependencies
├── Dockerfile → Builds Docker image
├── deployment.yaml → Kubernetes Deployment
└── service.yaml → Kubernetes Service
Create Project Folder.
1.Command:
- mkdir flask-api
Explanation:
mkdir flask-api → This creates a new folder named flask-api to store your project files.
Expected Output:

2.Command:
- cd flask-api
Explanation:
Moves you inside the folder so you can start creating files.
Expected Output:

Create app.py (Flask Application)
Command:
- nano app.py
Paste the Flask Application Code
from flask import Flask, jsonify
app = Flask(__name__)
@app.route(‘/’)
def hello():
return jsonify(message=”Hello from Flask API on Kubernetes!”)
if __name__ == ‘__main__’:
app.run(host=’0.0.0.0′, port=5000)
Explanation:
- Opens the nano text editor.
- You paste your Python code inside the editor.
- Then save the file:
- Press CTRL + O → Enter
- Press CTRL + X → Exit
Expected Output:

Create requirements.txt
Command:
- nano requirements.txt
Paste this,
Flask
Explanation:
· Opens a text file where you write the list of Python packages your app needs.
· Here, the only package needed is:
flask
Expected Output:

Create Dockerfile.
Command:
- nano Dockerfile
Paste the Dockerfile Code
FROM python:3.10-slim
WORKDIR /app
COPY requirements.txt .
RUN pip install -r requirements.txt
COPY app.py .
EXPOSE 5000
CMD [“python”, “app.py”]
Explanation:
- Opens a file named Dockerfile (no extension).
- A Dockerfile contains instructions to build a Docker image for your app.
- You paste your Dockerfile content inside.
Expected Output:

Build and Push Docker Image
1.Command:
- docker build -t yourusername/flask-api:v1 .
Explanation:
- docker build → Creates a Docker image.
- -t <name> → Gives your image a name.
- . → Means “build using the Dockerfile in the current folder”
Expected Output:

2.Command:
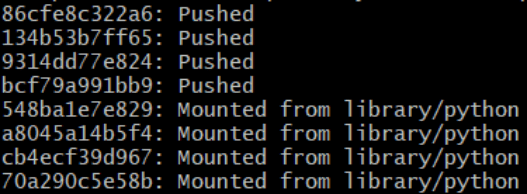
- docker push yourusername/flask-api:v1
Explanation:
- Uploads the Docker image to Docker Hub.
- Kubernetes will pull this image from Docker Hub during deployment.
Expected Output:
Conclusion.
In this tutorial, you learned how to build and containerize a simple Flask REST API using Docker and then deploy it on a Kubernetes cluster. By creating a Dockerfile, building your image, and running it locally, you gained a foundation in containerizing Python applications.
You then extended this by writing Kubernetes deployment and service YAML files, applying them to the cluster, and exposing the API so it could be accessed externally.
This process demonstrated the power of combining Docker for packaging applications and Kubernetes for managing and scaling them in a reliable way. With these fundamentals in place, you now have the skills to enhance your API, add more services, integrate databases, and move toward more advanced Kubernetes workflows in future tutorials.
- For more information about Kubernetes, you can refer to Jeevi’s page.