
Introduction.
Docker has revolutionized the way developers build, ship, and run applications, enabling them to package code, dependencies, and configurations into lightweight, portable containers. While many developers start with Docker by learning basic commands such as docker run or docker ps, the real power of Docker emerges when you begin exploring its networking capabilities. Networking in Docker is not just about connecting containers to the internet; it’s about enabling seamless, secure, and scalable communication between containers, services, and external systems. Understanding Docker networking is crucial for building complex applications that involve multiple microservices, databases, caches, and other components that need to interact efficiently.
At an intermediate level, Docker networking introduces a variety of networks beyond the default bridge network that comes preconfigured with Docker. Developers can create custom bridge networks, overlay networks for multi-host communication, and even macvlan networks for exposing containers directly on the physical network. Each of these network types serves a specific purpose, and knowing which one to use can dramatically impact the performance, security, and scalability of your containerized applications.
Docker also provides a rich set of commands to inspect, manage, and troubleshoot container networks. Commands such as docker network create, docker network connect, docker network inspect, and docker network disconnect allow you to manipulate networks with precision, giving you full control over how containers communicate. These commands are essential when you start building multi-container applications with complex dependencies or when you want to isolate certain containers for security or performance reasons.
Furthermore, Docker networking commands allow you to implement advanced features such as network aliasing, custom DNS, and service discovery, which are vital in orchestrated environments like Docker Compose or Docker Swarm. For example, when running multiple services in a Compose stack, custom networks ensure that containers can reference each other by service name rather than IP address, making your configuration more readable and maintainable.
In addition to creating and managing networks, intermediate users must also learn how to troubleshoot network issues effectively. Docker provides commands like docker network inspect and docker exec to probe network configurations and connectivity, enabling you to identify misconfigurations, connectivity bottlenecks, or port conflicts. Understanding how to interpret network details such as IP addresses, subnet masks, and gateway configurations can save hours of debugging time in production environments.
Security is another key consideration in Docker networking. By controlling which containers can communicate with each other and which networks are exposed externally, developers can minimize attack surfaces and enforce isolation policies. Commands that allow fine-grained network management are indispensable tools for anyone responsible for deploying containerized applications in a secure, production-grade environment.
This blog focuses on explaining these intermediate Docker networking commands in detail. We will break down each command, explain its syntax, demonstrate practical examples, and highlight common pitfalls to avoid. By the end of this guide, you will not only understand how to use Docker networking commands effectively but also gain confidence in designing, implementing, and troubleshooting container networks for real-world applications.
Intermediate Docker networking is the bridge between basic container operations and advanced orchestration. Mastering these commands is essential for developers, DevOps engineers, and system administrators who want to harness the full potential of Docker in both development and production environments. Whether you are building a multi-service application, deploying containers on multiple hosts, or simply experimenting with containerized networks, this guide will provide the knowledge and hands-on examples needed to navigate Docker networking like a pro.
By exploring the commands covered in this blog, you will learn how to create custom networks, connect containers to multiple networks, inspect network configurations, troubleshoot connectivity issues, and enforce network isolation. These skills are not just useful they are critical for ensuring that your containerized applications run efficiently, securely, and reliably.
With the growing adoption of microservices architectures, the ability to manage and troubleshoot container networks has become a fundamental skill for modern developers. Docker networking commands serve as the foundation for orchestrating container communication, managing service dependencies, and implementing secure and scalable network topologies.
In the sections that follow, we will delve into each intermediate networking command, providing step-by-step instructions, real-world use cases, and actionable tips. Whether you are an experienced Docker user or someone looking to go beyond the basics, this guide will enhance your understanding and empower you to leverage Docker networking to its full potential.
Named Containers & Environment.
docker run --name bbox -d busybox sleep 50
dockr exec bbox ls
docker run -d --name my_container -e "ENV_VAR=value" busybox
docker exec -it my_container bash
docker logs -f my_container                    # Follow logs in real-time
docker exec -it my_container sh                # For Alpine-based images


🔸 Port Mapping & Volumes.
docker run nginx
docker run -i busybox
docker run -it busybox
docker run --name nginx1 -d -p 80:80 nginx
docker run -p 8080:80 -p 443:443 nginx  # Multiple ports
docker run -d -e MYSQL_ROOT_PASSWORD=db_pass123 -p 3306:3306 --name mysqlbox mysql


🔸 Build & Tagging.
docker build -t my_image:1.0 -f Dockerfile.prod .  # Specify Dockerfile
docker tag old_image:tag new_image:tag        # Retag an image

🔸 Image Management.
docker save -o image.tar my_image:1.0         # Export image
docker load -i image.tar                      # Import image
docker image inspect my_image                 # Detailed image info
Advanced Docker Commands
🔸 Networking Deep Dive
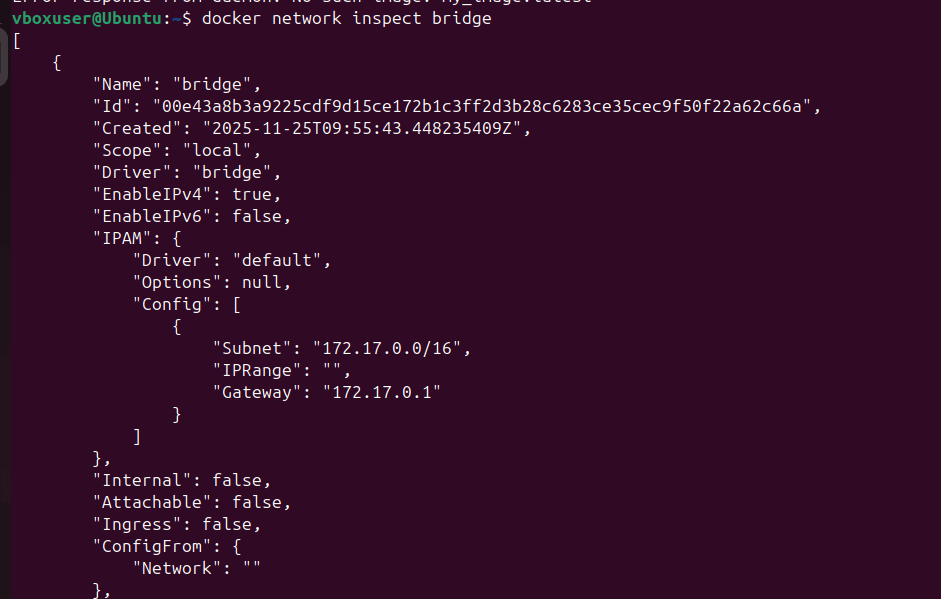
docker network inspect bridge                 # Inspect default network
docker run --network=none <image>             # No network access
docker run --dns 8.8.8.8 <image>             # Custom DNS
🔸 Docker Compose (Production-Ready)
Make sure the following package has been installed already.
sudo curl -L "https://github.com/docker/compose/releases/download/1.29.2/docker-compose-$(uname -s)-$(uname -m)" -o /usr/local/bin/docker-compose
sudo chmod +x /usr/local/bin/docker-compose

sudo yum install docker
sudo systemctl start docker
sudo chmod 777 /var/run/docker.sock

version: '3.8'

services:
  db:
    image: mariadb:10.6
    container_name: wordpress_db
    restart: unless-stopped
    environment:
      MYSQL_ROOT_PASSWORD: your_root_password
      MYSQL_DATABASE: wordpress
      MYSQL_USER: wordpress
      MYSQL_PASSWORD: wordpress_password
    volumes:
      - db_data:/var/lib/mysql
    networks:
      - wordpress_network
    healthcheck:
      test: ["CMD", "mysqladmin", "ping", "-h", "localhost"]
      interval: 10s
      timeout: 5s
      retries: 5

  wordpress:
    image: wordpress:latest
    container_name: wordpress_app
    restart: unless-stopped
    depends_on:
      db:
        condition: service_healthy
    environment:
      WORDPRESS_DB_HOST: db
      WORDPRESS_DB_USER: wordpress
      WORDPRESS_DB_PASSWORD: wordpress_password
      WORDPRESS_DB_NAME: wordpress
    volumes:
      - wordpress_data:/var/www/html
    ports:
      - "80:80"
    networks:
      - wordpress_network
    healthcheck:
      test: ["CMD", "curl", "-f", "http://localhost/wp-admin/install.php"]
      interval: 30s
      timeout: 10s
      retries: 3

  phpmyadmin:
    image: phpmyadmin:latest
    container_name: wordpress_phpmyadmin
    restart: unless-stopped
    depends_on:
      - db
    environment:
      PMA_HOST: db
      PMA_PORT: 3306
      PMA_ARBITRARY: 1
    ports:
      - "8080:80"
    networks:
      - wordpress_network

volumes:
  db_data:
  wordpress_data:

networks:
  wordpress_network:
    driver: bridge
docker compose -f docker-compose.prod.yml up --build -d ## Verification http://localhost:80
🔸 Multi-Stage Builds (Optimized Images)
# Dockerfile
FROM node:16 as builder
WORKDIR /app
COPY . .
RUN npm install && npm run build

FROM nginx:alpine
COPY --from=builder /app/dist /usr/share/nginx/html
Troubleshooting & Optimization
🔹 Debugging
docker events                            # Real-time container events
docker diff <container_name>            # Changed files in container
docker cp <container>:<path> <host_path> # Copy files from container
🔹 Resource Management
docker run --memory=1g --cpus=2 <image> # Limit resources
docker update --memory=2g <container>   # Update running container
🔹 Cleanup Script
# Remove all unused objects (careful!)
docker system prune -a --volumes
Conclusion.
Intermediate Docker networking commands open the door to more flexible, secure, and production-ready container environments. By moving beyond basic network creation and attachment, you gain the ability to fine-tune how containers communicate, isolate services, integrate with existing infrastructure, and troubleshoot complex networking issues. Mastering tools like docker network inspect, docker network connect/disconnect, custom bridge networks, overlays, and DNS controls empowers you to design architectures that are both scalable and resilient. As you continue building and deploying containerized applications, a solid understanding of these networking features becomes essential for ensuring performance, clarity, and operational reliability.
- For more information about Docker, you can refer to Jeevi’s page.