
Introduction.
Creating a cluster in Amazon EKS and installing kubectl means setting up a managed Kubernetes environment on AWS and installing the CLI tool used to control it. EKS creates the Kubernetes control plane for you, while kubectl lets you connect to the cluster, deploy applications, manage pods, services, and configurations all from your local machine.
Lab Steps
Step 1: Sign to the AWS Management Console
1. Click on the Open Console button, and you will get redirected to AWS Console in a new browser tab.
2. Copy your User Name and Password in the Lab Console to the IAM Username and Password in the AWS Console and click on the Sign in button.
Step 2: Set Up an EKS Cluster
1. Ensure that your AWS region is set to N. Virginia.
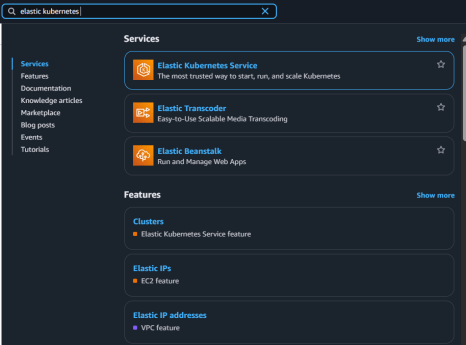
2. Open the EKS (Elastic Kubernetes Service) page by choosing it from the Services list under the Containers category.
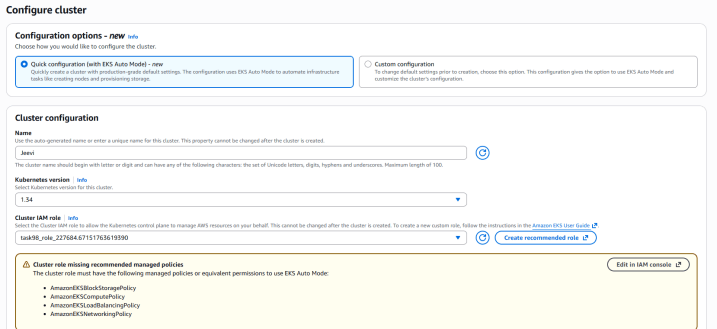
3. Press the Create cluster option.

4. Provide the cluster name as Jeevi ( your preferred name).
5. Leave the Kubernetes version unchanged (use the default option).
1. Cluster IAM Role: Pick the already available IAM role.
Note: You can ignore the warning messages displayed here.
2.Node IAM Role: Select the pre-existing IAM role.
6. VPC: Choose the default VPC from the list.
7. Subnets: Pick the subnets belonging to us-east-1a, us-east-1b, and us-east-1c, and delete/unselect the subnets us-east-1e and us-east-1f.

8. Press the Create button.
9.If the cluster is ready , it is shown like below:


Step 3: Create an Environment in CloudShell
1. Make sure you are in the N. Virginia Region.
2. Click on the AWS CloudShell icon on the top AWS menu bar.

3. Once the environment is created, you are ready to use the terminal.

Step 4: Install Kubectl on AWS CloudShell
Once the environment is ready, run all these commands in the terminal. Download the Amazon EKS vended kubectl binary for your cluster’s Kubernetes version from Amazon S3. To do so, run the following command:

2. Give execute permission to the kubectl file.

Move the kubectl binary into a directory that is included in your system PATH. If an older kubectl exists, it is recommended to create a $HOME/bin directory and make sure $HOME/bin is at the beginning of your $PATH:

4.To confirm kubectl was installed successfully, check its version using:

Step 5: Set Up AWS CloudShell so it can connect to your EKS Cluster
1. After CloudShell loads completely, you must install and use the kubectl command-line tool to interact with your Kubernetes cluster.
2. Generate the kubeconfig file for your cluster by running this command:

Note: Replace with your cluster name.
3.Test your configuration ,with the following command :


Conclusion:
1. You have successfully built and deployed your Amazon EKS cluster.
2. You have properly installed the kubectl tool inside AWS CloudShell.
3. You have also configured CloudShell so it can interact with your EKS cluster without issues.