
Introduction.
Creating an AWS EC2 Instance and running AWS CLI commands means launching a virtual server in AWS and then using the AWS Command Line Interface to perform basic operations such as checking resources, managing services, or testing AWS access directly from that server’s terminal.
Lab Steps
Step 1: Sign to the AWS Management Console
1. Click on the Open Console button, and you will get redirected to AWS Console in a new browser tab.
2. Copy your User Name and Password in the Lab Console to the IAM Username and Password in the AWS Console and click on the Sign in button.
Step 2: Launching an EC2 Instance
- Ensure that your AWS console is set to the N. Virginia (us-east-1) region.
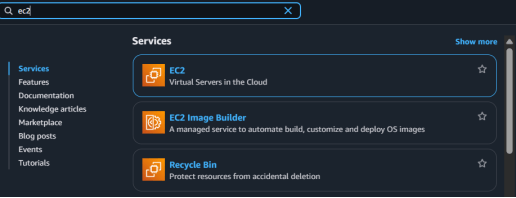
- From the Services menu at the top of the dashboard, navigate to EC2 under the Compute category.
3. In the EC2 dashboard, select Instances from the left-hand panel and click Launch Instances to begin creating a new virtual server.

4. Name: Enter MyEC2Instance as the instance name.
5.For the Amazon Machine Image (AMI), search for Amazon Linux 2023 AMI under the Quick Start section.
6. For Instance

- For the Key pair section, click Create a new key pair.
- Key pair name: Enter MyEC2-key
- Key pair type: Choose RSA
- Private key file format: Select .pem

8. Then click Create key pair to download the file.
9. Network Settings
Click Edit to modify the network configuration.
- Auto-assign public IP: Set to Enable
- Select Create new security group
Enter the following details:
- Security group name:MyEC2-SG
- Description: Security group allow traffic to EC2 instance
To allow SSH access:
- Type: SSH
- Source: Anywhere (All IP addresses)
- Advanced Details
Expand the Advanced details section.
For IAM instance profile, choose EC2_Role_<RANDOM_NUMBER>

10. Leave all other settings as default and click Launch Instance.
11. Click View all Instances to see the newly created instance.
12. Under Launch Status, your instance will begin initializing.
14. Click the Instance ID and wait until the status changes to Running

Step 3: Connect to the EC2 Instance via SSH
- Follow the standard steps for SSH access to your EC2 instance to log in securely.
Step 4: Create a Key Pair Using the AWS CLI
Use the following AWS CLI command to generate a new Key Pair in the us-east-1 region.

Run this command, to set necessary permissions.

Step 5: AWS CLI command to create a Security Group
- The below command will create a Security Group in the us-east-1 region.

Once you get the below output, you have successfully created a Security Group.

Step 6: AWS CLI command to create an EC2 Instance
- The below command will create one t2.micro EC2 instance with Amazon Linux 2 AMI in the us-east-1 region.

Then you get the below output,

Step 7: View the EC2 instance you created
- Make sure you are in the N.Virginia Region.
- Navigate to Services menu in the top, then click on EC2 in the Compute section.
- Navigate to Instances in the left panel.
- You will be able to see the new EC2 instance has been created. Copy the instance ID for later use.

Conclusion.
- You have successfully launched and configured an Amazon EC2 instance.
- You have securely connected to your instance using SSH.
- You have created a Key Pair using the AWS CLI.
- You have generated a Security Group through AWS CLI commands.
- You have also provisioned an EC2 instance using the AWS CLI.
- For more information about AWS, you can refer to Jeevi’s page.