
Introduction:
In Kubernetes, managing resources like CPU and memory is important to ensure that applications run smoothly and the cluster remains stable. Resource management uses concepts like Resource Requests, Resource Limits, and ResourceQuota. Requests define the minimum resources a pod needs, limits set the maximum it can use, and ResourceQuota controls the total resources available in a namespace. Together, they help Kubernetes schedule pods efficiently, prevent resource overuse, and maintain fair usage across users and teams
Prerequisites:
-
- Kubernetes cluster running (single-node or multi-node)
-
- kubectl installed and configured
-
- Basic understanding of pods and Deployments
-
- Optional: nano or vi editor for creating YAML files
What is Kubernetes Resource Management?
-
- Kubernetes resources include CPU and memory.
-
- Resource management ensures pods get enough resources to run and prevents cluster overload.
What are Resource Requests?
-
- Minimum CPU/memory guaranteed to a pod.
-
- Kubernetes uses requests to schedule pods onto nodes.
What are Resource Limits?
Resource Limits define the maximum amount of CPU and memory a pod is allowed to use in Kubernetes. If a container tries to use more than its limit, Kubernetes restricts CPU usage or kills the container for memory overuse. Limits ensure that no single pod consumes excessive resources and affects other applications in the cluster.
What Are Requests and Limits in Kubernetes and Why Are They Important?
Requests specify the minimum CPU and memory a pod needs, and limits define the maximum it can use. Kubernetes uses requests for scheduling and limits to prevent resource overuse. They are important because they ensure stability, fairness, and efficient resource management in the cluster.
What is ResourceQuota?
-
- Limits total resources used in a namespace.
-
- Prevents one user/team from consuming too many resources.
-
- it shows that Kubernetes evaluates each new pod before creating it.
-
- Kubernetes checks if the pod fits within the allowed quota.
-
- If resource usage reaches the limit, Kubernetes blocks the creation of new pods.
-
- The image highlights the idea of tracking, limiting, and reviewing resource usage
What happens if a pod exceeds its CPU limit?
When a pod exceeds its CPU limit, Kubernetes does not kill it. Instead, it throttles the pod, restricting how much CPU it can use. This causes the application to slow down and respond more slowly. The pod keeps running, but its performance is reduced.
What happens if a pod exceeds its memory limit?
When a pod exceeds its memory limit, Kubernetes immediately kills the container with an OOMKilled error. Memory cannot be throttled, so the system must stop the container to protect the node. The pod may restart repeatedly if it continues to use more memory than allowed.
Which resources can a ResourceQuota control in a namespace?
ResourceQuota in Kubernetes is like a limit set for a namespace. It controls how many resources—like pods, CPU, memory, or storage—can be used in that namespace. When you create a quota, Kubernetes keeps track of the total resources used. Every new pod or resource created must fit within the remaining quota. If a pod tries to use more than the allowed quota, Kubernetes will prevent it from being created. This ensures fair usage and prevents one user or team from consuming all the resources in the namespace.”
What Is a Namespace in Kubernetes and Why Do We Use It?
A Namespace in Kubernetes is a logical partition that separates resources inside a cluster. It helps different teams or environments work independently without affecting each other. We use namespaces to organize resources, improve security, and apply limits like ResourceQuota for fair usage
Resource Requests:
1.Command:
nano pod-requests.yamlPaste this,
apiVersion: v1
kind: Pod
metadata:
  name: resource-request-pod
spec:
  containers:
    - name: request-container
      image: nginx
      resources:
        requests:
          memory: "64Mi"
          cpu: "250m"
Explanation:
-
- Opens the text editor
nanoto create or edit the filepod-requests.yaml.
- Opens the text editor
-
- This YAML file defines a Pod with resource requests, i.e., how much CPU and memory a container requests from Kubernetes.
Expected Output:

2.Command
kubectl apply -f pod-requests.yamlExplanation:
-
- Creates the Pod defined in
pod-requests.yaml.
- Creates the Pod defined in
-
applyensures the cluster creates or updates the resource as described in the YAML
Expected Output:

3.Command:
kubectl describe pod resource-request-podExplanation:
-
- Shows detailed information about the Pod
resource-request-pod.
- Shows detailed information about the Pod
-
- Key info includes:
- Status of the Pod
- Node assigned
- Containers and their resource requests
- Events (if something failed during creation)
- Key info includes:
Expected Output:

Resource Limits:
1.Command:
nano pod-limits.yamlPaste this,
apiVersion: v1
kind: Pod
metadata:
  name: resource-limit-pod
spec: containers:
        - name: limit-container
          image: nginx
          resources:
            limits:
              memory: "128Mi"
              cpu: "500m"
Explanation:
-
- Opens
nanoto create/edit a Pod YAML that defines resource limits.
- Opens
-
- Resource limits define the maximum CPU and memory a pod can use.
Expected Output:

2.Command:
kubectl apply -f pod-limits.yamlExplanation:
-
- Creates the pod with resource limits defined in
pod-limits.yaml.
- Creates the pod with resource limits defined in
Expected Output:

3.Command:
kubectl get pod resource-limit-podExplanation:
-
- Lists the pod
resource-limit-podwith basic info like:- Name
- Status
- Node
- Ready state
- Lists the pod
Expected Output

4.Command:
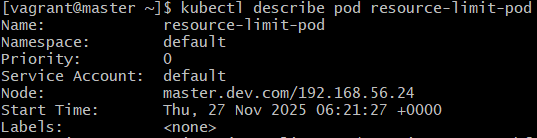
kubectl describe pod resource-limit-podExplanation:
-
- Shows detailed information about the pod, including resource limits and usage events.
Expected Output:
ResourceQuota:
1.Command:
nano resource-quota.yamlPaste this,
apiVersion: v1
kind: ResourceQuota
metadata:
  name: demo-quota
spec:
  hard:
    pods: "2"
    requests.cpu: "1"
    requests.memory: "1Gi"
    limits.cpu: "2"
    limits.memory: "2Gi"
Explanation:
-
- Opens a YAML file to create a ResourceQuota, which limits total resources used in a namespace.
Expected Output:

2.Command:
kubectl apply -f resource-quota.yamlExplanation:
Creates the ResourceQuota in the namespace.
Expected Output:

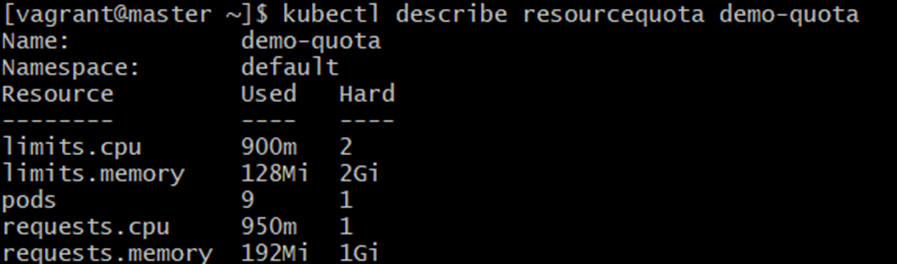
3.Command:
kubectl describe resourcequota demo-quotaExplanation:
-
- Shows the quota usage in the namespace:
- How many pods are used vs allowed
- CPU /memory requested and limited vs quota
- Shows the quota usage in the namespace:
Expected Output:
Creating Pods Under Quota:
1.Command:
nano pod-with-quota.yamlPaste this,
apiVersion: v1
kind: Pod
metadata:
  name: pod-with-quota
spec:
  containers:
    - name: quota-container
      image: nginx
      resources:
      requests:
        memory: "128Mi"
        cpu: "250m"
      limits:
        memory: "256Mi"
        cpu: "500m"
Explanation:
-
- Opens YAML editor to define a pod that respects the namespace quota.
Expected Output:

2.Command:
kubectl apply -f pod-with-quota.yamlExplanation:
-
- Creates the pod under the quota restrictions.
-
- If the pod exceeds the quota, creation fails.
Expected Output:

3.Command:
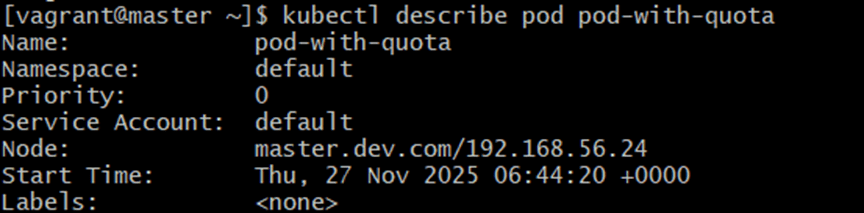
kubectl describe pod pod-with-quotaExplanation:
-
- Shows detailed information about this pod including:
- Resource requests/limits
- Node assignment
- Events (like quota apllied or errors if exceeded)
- Shows detailed information about this pod including:
Expected Output:
Conclusion
Effective resource management is essential for running stable, predictable, and efficient applications in Kubernetes. By defining Resource Requests and Limits, you ensure that each pod receives the minimum resources it needs while preventing any single pod from consuming more than its fair share. This protects the cluster from performance degradation and ensures application reliability.
Using ResourceQuota, you can enforce fair usage across teams and namespaces. Kubernetes continuously evaluates resource consumption against these quotas, blocking new workloads when limits are reached. This prevents resource exhaustion and encourages better planning, monitoring, and optimization of workloads.
For more information about kubernetes, you can refer jeevi’s page